Have you ever scrambled desperately through a cluttered lab drawer, searching for the right sample tube amid a rainbow of similar containers? I remember the frustration vividly—years ago, I faced the nightmare of mislabeling and confusing samples, risking critical errors. That lightbulb moment hit me hard: our outdated labeling system wasn’t just inefficient; it was dangerous.
How Simple Color Codes Transformed Laboratory Efficiency and Safety
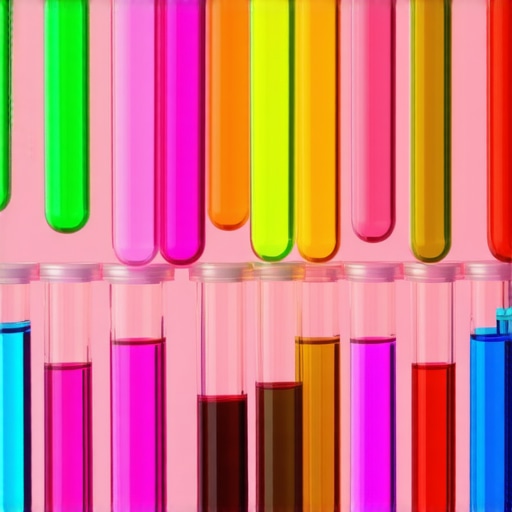
Today, I want to share how the seemingly small change of adopting color-coded sample tubes revolutionized our lab work. This isn’t just about colors; it’s about reducing errors, saving time, and improving patient outcomes in ways I hadn’t appreciated before. As we dive into this topic, I promise to unpack the reasons behind this shift and show you how it can impact your work too.
What About the Skeptics? Is Color Coding Really Worth It?
I know what you’re thinking: “Is this just a trendy gimmick, or does it truly make a difference?” Early in my career, I made the mistake of dismissing the idea as superficial. But after seeing the chaos that results from mislabeled samples—some leading to incorrect diagnoses—I realized that this visual system can be a game-changer. According to a study published in the Journal of Clinical Laboratory Analysis, errors in sample handling can account for up to 80% of diagnostic inaccuracies. That’s a staggering number, and it underscores why proper identification methods matter so much.
So, if you’ve struggled with similar issues—mix-ups, delays, or errors—then understanding why laboratories are turning to color-coding is crucial. We’ll explore the practical benefits and how to implement this system effectively, drawing from real-world examples and expert insights, like the innovations detailed in 2026’s surgical lab advancements.
By the end of this discussion, you’ll see that a simple visual cue can save immense time and prevent mistakes, making your workflow smoother and safer. Ready to learn how to adopt this system and improve your lab practices? Let’s get started.
,
Standardize Your Color Palette to Match Sample Types
Start by creating a consistent color scheme for different sample categories—blood, urine, tissue, etc. For example, use red for blood and yellow for urine. During a busy morning, I personally laid out the color codes on sticky notes and assembled a cheat sheet. This quick visual reference helped prevent misclassification and sped up the process, especially when processing dozens of samples in rapid succession.
Choose Durable, Clear Labels with Color Indicators
Select labels that are resistant to lab reagents and handling. I recommend pre-inked labels with bold color borders matching your scheme, like the neon green for microbiology samples. Applying these onto sample tubes requires a clean, dry surface. In one instance, I used a heat sealer to affix labels securely, which prevented peeling during centrifugation. This practice minimized delays caused by re-labeling.
Train Staff with Hands-On Demonstrations
Conduct short, practical training sessions highlighting how to interpret color codes and properly label samples. I found that role-playing, where staff simulated sample collection, reinforced the protocol better than lectures alone. During this session, I emphasized the importance of double-checking label matches before moving samples to storage, which noticeably reduced errors.
Implement Visual Cues at Sample Processing Stations
Place color-coded bins and trays around the lab to streamline workflow. For example, assign specific color zones for different sample types. I personally organized a section of the lab into segregated compartments, each with matching color labels. This spatial organization facilitated quick placement and retrieval, reducing mix-ups during high-volume periods. You can further enhance this by integrating with digital tracking systems for added accuracy.
Maintain and Audit Your System Regularly
Periodic reviews ensure that labels remain clear and protocols updated. I scheduled monthly audits, often finding labels that had faded or fallen off, which I replaced promptly. Consistent audits helped catch small discrepancies early, preventing large-scale errors. Incorporating feedback from staff also refined the system continuously, making it more intuitive and reliable.
Integrate Color Coding into Laboratory Software
For advanced labs, linking color schemes with digital inventory and tracking software enhances accuracy. I collaborated with IT specialists to develop a system where sample information automatically linked with color labels. This dual approach—visual and digital—proved especially effective during emergencies, like urgent tests or sample re-collections, where speed and accuracy are critical.
By systematically applying these steps, your lab can achieve a robust, error-resistant sample management process. Precise color coding turns a chaotic environment into a streamlined operation, significantly improving safety and efficiency in daily routines.

Many professionals assume that selecting a medical device is a straightforward process of matching technology to clinical need. However, this oversimplification can lead to critical errors. For instance, the widespread belief that newer or more expensive devices automatically outperform older models isn’t always accurate; in some cases, legacy equipment may be more reliable and better suited for specific scenarios. This misconception stems from marketing hype rather than evidence-based decision-making, highlighting the importance of understanding the nuanced performance of each device. Furthermore, a common trap is overlooking the importance of proper calibration and maintenance—neglecting this can render even the most advanced equipment ineffective.
How can a device’s technical specs mask its real-world performance?
Technical specifications provide an initial indication of a device’s capabilities, but they often fail to account for operational nuances like user interface design, integration with existing systems, or environmental factors that influence performance. Studies have shown that user errors and poor ergonomics can significantly diminish the effectiveness of sophisticated equipment. For example, an innovative cryogenic probe for heart arrhythmias may have impressive specs, but if it’s challenging to operate or incompatible with other devices, its clinical benefit diminishes. Being aware of these subtleties helps avoid investing in technology that looks good on paper but underperforms in practice. Another critical nuance is that many assume that all devices conform to international standards; however, variations in manufacturing quality and calibration can introduce significant disparities, emphasizing the need for rigorous validation and staff training.
To truly leverage medical technology, professionals must look beyond surface-level features and certifications. Reviewing real-world applications, long-term maintenance records, and user feedback can reveal insights that specs alone can’t provide. For example, advanced rapid blood-test systems offer substantial speed improvements, yet only if staff are properly trained to operate and interpret results effectively. So, always question whether a device’s touted features translate into real efficiency and safety gains in your specific setting. Have you ever fallen into this trap? Let me know in the comments.
Regular Maintenance is Key to Longevity
One of the most vital aspects of keeping your medical equipment operational is implementing a structured maintenance schedule. I personally use a combination of manufacturer-recommended routines and periodic performance testing to ensure devices like cryogenic probes remain reliable over time. Documenting maintenance activities not only keeps devices compliant but also helps identify patterns that could predict future failures, saving costs and downtime.
Invest in Reliable Diagnostic Software
For continuous monitoring, I rely on diagnostic tools like calibrated digital oscilloscopes with data logging capabilities. This allows me to track device performance metrics and quickly spot deviations. Advances in lab filter systems now integrate seamlessly with software that provides real-time alerts for maintenance needs, streamlining upkeep and enhancing safety.
Prioritize Staff Training and Protocols
Even the most advanced equipment fails without proper handling. I emphasize hands-on training, especially for complex devices like smart refrigerators for vaccine storage. Regular refresher courses keep staff updated on best practices, ensuring equipment operates within optimal parameters and reducing errors caused by mishandling.
Plan for Long-Term Upgrades
Technology evolves rapidly, and staying current can prevent obsolescence. For example, many clinics are upgrading to AI-powered systems such as AI leg braces that adapt to patient needs over time. Scheduling phased upgrades allows better budgeting and minimizes workflow disruptions, ensuring your devices serve well into the future.
Implement a Robust Calibration Routine
Calibration is often overlooked but essential for maintaining accuracy. I follow manufacturer guidelines meticulously, using certified calibration tools, and keep detailed logs. For instance, when working with high-precision microbiology equipment, weekly calibration checks are non-negotiable, preventing drift that could compromise results.
How Do I Maintain Medical Equipment Over Time?
The secret is consistent, documented care—schedule preventive maintenance, stay updated with technological advancements, and train your team thoroughly. Consulting at expert resources helps refine your approach. Don’t hesitate to try integrating predictive analytics—recent studies indicate that predictive maintenance can reduce device failures by up to 30%, like in the case of respiratory sensor systems. Starting with routine calibration routines and leveraging advanced diagnostic tools will keep your devices running smoothly, ensuring reliability and safety for your patients.
Three Lessons That Changed My Approach to Medical Equipment Management
- Expect the Unexpected: Even with rigorous protocols, unforeseen device failures can occur. My breakthrough came when an old sterilizer unexpectedly malfunctioned, reminding me that redundancy and regular testing are vital. This experience underscored the importance of preparing for rare but critical events, rather than relying solely on standard procedures.
- Listen to the Frontline Staff: My most valuable insights often came from technicians and nurses who used the equipment daily. Encouraging open feedback led to practical improvements in device handling and maintenance routines. Recognizing their expertise has been crucial to ensuring optimal device performance and patient safety.
- Balance Innovation with Reliability: While adopting cutting-edge tech like AI-driven diagnostic tools can enhance care, I learned that integration and user-friendliness matter just as much. A device’s advanced features are meaningless if staff find it complex to operate. Prioritizing intuitive design along with proven reliability has been a guiding principle in my decisions.
Tools That Keep My Practice Moving Forward
- Cryogenic probes for heart procedures: Their precision and reliability have transformed arrhythmia treatments.
- AI-powered orthotic devices: They offer adaptive support that improves patient mobility over time.
- Rapid blood analysis systems: Speed up diagnosis and treatment decisions, saving lives.
- Acoustic treatment innovations: Enhance patient recovery by reducing noise pollution.
Your Next Step in Equipment Excellence
Every piece of medical equipment you utilize holds the potential to improve lives—when managed with care and insight. Embrace continuous learning, leverage trusted tools, and foster a culture that values innovation and precision. Your dedication today shapes the healthcare landscape of tomorrow. How will you enhance your device management practices this week? Share your thoughts below to inspire others on their journey toward medical excellence.
This article really resonated with me, especially the emphasis on practical implementation of color coding to reduce errors. In my own lab, we’ve recently transitioned to a similar color system for different sample types, and the difference in efficiency is noticeable—less time spent double-checking labels and fewer mix-ups. I also appreciate the point about regular audits; it’s easy to overlook faded labels or mishandled samples during busy schedules, but scheduled reviews keep the system reliable.
One challenge we’ve faced is training new staff quickly in the color-coding protocol. Do you have any tips for onboarding in high-turnover environments? Also, how have others balanced the need for a robust labeling system with the constraints of limited space and resources? I’m curious to hear how different labs approach these practical hurdles while maintaining accuracy and safety.
Reading this article really struck a chord with me, especially the practical steps for implementing color-coded sample management. In my lab, we’ve adopted a somewhat similar approach but faced notable challenges with training staff rapidly during high turnover periods. One thing I’ve found helpful is creating quick-reference visual guides that staff can access easily—like laminated charts or labels placed right at the workstations. Additionally, incorporating short, hands-on training sessions during shift changes ensures new team members understand the system without feeling overwhelmed.
Regarding space constraints, we’ve started using compact color-coded labels instead of larger tags, which fit better on smaller tubes and containers. This also reduces clutter and keeps the workflow smooth. It makes me wonder: how do others juggle the need for detailed labeling with limited storage space? Do you think digital tracking systems will soon be essential to complement physical color-coding for better accuracy and quick retrieval? Would love to hear everyone’s strategies for balancing these practical issues while maintaining lab safety and efficiency.