Have you ever reached into a test tube, expecting a quick rinse or scrub, only to realize that your brush just isn’t cutting it? I’ve been there—frustrated, wasting precious time trying to scrub stubborn residues, only to end up frustrated and with a sore hand. That moment of realization—when I finally understood that my choice of cleaning tools directly impacted the accuracy of my lab results—was a lightbulb moment for me. It made me realize how crucial the right 6 Lab Test Tube Brush with Nylon Bristles truly is in maintaining the integrity of my work.
Why Choosing the Right Lab Test Tube Brush Matters More Than You Think
Cleanliness is the backbone of reliable lab results. Yet, it’s surprising how often we overlook a simple tool—like a test tube brush—that can make or break our workflows. When I first started, I didn’t give much thought to my brushes—just grabbed whatever was available. But I learned the hard way that using subpar brushes leads to incomplete cleaning, potentially contaminating samples and skewing data.
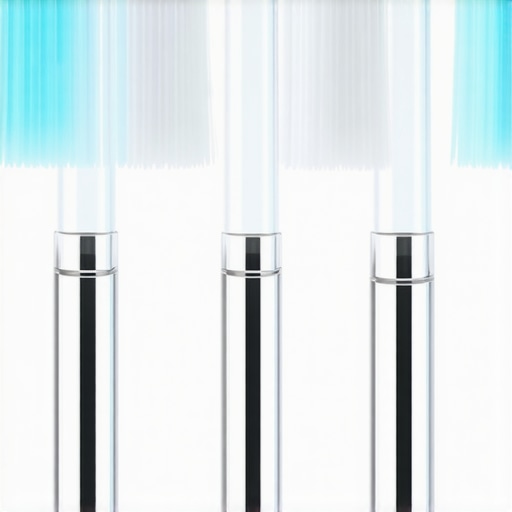
Investing in a high-quality lab test tube brush with nylon bristles made all the difference. Not only did it scrub away residues more effectively, but it also protected my fragile glassware from scratches. Nylon bristles are gentle yet tough, offering flexibility for different tube shapes without damaging the surfaces. Plus, they dry quickly, minimizing microbial growth—a small but vital detail for ensuring hygiene and sample integrity.
But here’s the kicker—choosing the right brush isn’t just about bristle material. It’s about finding a perfect fit for your lab’s specific needs. Do you often work with narrow-neck test tubes? Or do you require a more robust brush for larger volume flasks? These considerations matter. I once bought a generic brush with stiff bristles, which ended up scratching my delicate glassware. That mistake could have easily been avoided with a bit more research.
So, if your current cleaning tools are less than stellar, it might be time for an upgrade. Your lab’s accuracy relies on it. Keep reading, and I’ll walk you through choosing the best brushes, common pitfalls to avoid, and some helpful tips to keep your equipment spotless—saving you time, money, and headaches along the way.
Is a Nylon Bristle Test Tube Brush Truly Better for Your Lab?
It’s only natural to wonder if investing in specialized brushes is really worth it. Believe me, I’ve made the mistake early on of thinking that all brushes are created equal. I was wrong. The real advantage of nylon bristles lies in their durability, non-reactivity, and gentle cleaning power, meaning they won’t compromise your samples or introduce contaminants.
Research shows that nylon bristles are resistant to many chemicals used in laboratories, making them a safe and long-lasting choice. Asking yourself if your current brushes are truly helping you maintain sample purity? If not, it might be time to reconsider your options. Need a starting point? Check out more detailed guides on lab equipment and cleaning tools at Medical Device Insight.
Now, let’s get into how to select the right brush for your needs—so you can clean smarter, not harder.
,
Measure Precise Dimensions to Fit Your Test Tubes
Start by evaluating the size and shape of your test tubes. Use a caliper to measure their diameter and length. Select a test tube brush with nylon bristles that comfortably fits your smallest tubes without excessive wobbling. I once bought a brush that was too large for my narrow-neck tubes, leading to ineffective cleaning and scratches. It was a costly mistake that taught me the importance of precise measurements before purchasing.
Prepare Your Workspace for Effective Cleaning
Clear your lab surface and assemble all necessary tools, including gloves, brushes, cleaning solution, and rinsing containers. Wearing gloves protects samples and maintaining hygiene is crucial. For delicate glassware, I use a disassembled rack to hold test tubes securely—preventing accidental drops during scrubbing. Establishing a dedicated, organized space streamlines the cleaning process and reduces contamination risk.
Choose the Right Cleaning Solution
Select an appropriate solvent or disinfectant compatible with your test tubes’ materials. For most glassware, a mild detergent or alcohol-based solution suffices. I prefer a solution specifically designed for lab glassware, ensuring no residual chemicals affect future samples. Always check your manufacturer’s recommendations—using the wrong solution can degrade the material or interfere with tests.
Implement Proper Scrubbing Technique
Insert the nylon bristle brush into the test tube, ensuring it reaches the bottom without forcing it. Move the brush in a gentle spiral, applying consistent pressure to dislodge residues. I remember one session where I applied too much pressure, causing bristles to fray prematurely. By adopting gentle, consistent strokes—and rotating the test tube—I achieved thorough cleaning without damage.
Optimize Brush Movement for Stubborn Residues
For stubborn deposits, rotate the test tube slowly while scrubbing, maintaining contact with all interior surfaces. Use a twisting motion to ensure coverage of all angles. Once, I faced residue buildup that wouldn’t budge; after applying this method for an extra minute, the tubes sparkled—saving time and avoiding chemical scrubbing.
Rinse Thoroughly to Eliminate Residues
Immediately after scrubbing, rinse the test tubes with distilled water to remove any loosened debris or chemical traces. Do this multiple times, tilting the tube to ensure all residues wash away. During my early days, skipping this step led to contamination, emphasizing the importance of thorough rinsing.
Dry Properly to Prevent Microbial Growth
Use a lint-free cloth or let the tubes air dry upside down in a clean rack. For faster drying, gently shake the tube to expel excess water. I once left tubes to air dry overnight, only to find microbial growth the next day—highlighting the importance of proper drying techniques.
Inspect Each Tube for Cleanliness
Visually check for streaks or remaining residues. Hold the tube against a light source; if visible residue remains, repeat the cleaning process. I learned this after noticing faint stains; re-cleaning eliminated the problem and ensured sample integrity.
Regular Maintenance of Your Brush
Clean your nylon bristle brushes after each use by rinsing thoroughly and drying. Replace brushes when bristles become frayed or deformed. An overlooked brush caused contamination in my lab, underlining the importance of maintenance for ongoing effectiveness.
By following these precise, step-by-step techniques, you’ll ensure your test tubes are impeccably clean, preserving the accuracy of your experiments. Remember, investing time in proper cleaning methods minimizes errors and saves resources in the long run.
Many assume that choosing medical equipment is straightforward, but myths and overlooked nuances can lead to costly mistakes. For instance, it’s common to believe that cheaper supplies are equally effective; however, skimping on quality often results in compromised patient safety or inaccurate diagnostics. One prevalent misconception is that all devices labeled as compliant meet the same standards. In reality, certifications vary, and relying solely on labels can be a trap leading to equipment incompatibility or regulatory issues. Furthermore, many underestimate the importance of understanding the specific environmental requirements and maintenance protocols of high-precision instruments, which are critical for ensuring longevity and accuracy.
A common oops is neglecting to verify the compatibility of disposable items, such as [disposable exam capes](https://medicaldeviceinsight.com/7-disposable-exam-capes-for-2026-gyn-clinics), with existing equipment. Using incompatible accessories can cause malfunction or contamination risks. Experienced practitioners know that the devil is in the details—small design features, material choices, and assembly standards can significantly impact performance and safety.
Think about calibration and validation. Many believe that once a device is purchased, it will serve well for years without recalibration. This is false; regular calibration ensures accuracy, especially for critical measurements like blood pressure or lab analytes. Neglecting this step can lead to systematic errors, jeopardizing both lab results and patient outcomes.
Another sneaky trap lies in the assumption that newer models are always better. Sometimes, legacy equipment is more reliable due to proven track records, whereas newer models may still have bugs or untested features. This highlights the need for thorough evaluation, including user reviews, peer recommendations, and manufacturer support.
From an advanced perspective, it’s worth considering the importance of understanding the entire lifecycle and potential obsolescence of medical devices. For example, some high-tech solutions require ongoing firmware updates, which newer staff or maintenance personnel may overlook, leading to security vulnerabilities or non-compliance. Ensuring staff training on these subtleties is crucial.
It’s also essential to recognize the influence of supply chain stability. Relying on equipment from manufacturers with weak logistical support or limited spare parts can leave your practice vulnerable. For instance, varieties of [lab reagents](https://medicaldeviceinsight.com/6-lab-pipette-pumps-with-smooth-dial-control) are only effective if the consumables are readily available, avoiding interruptions.
Do you ever find yourself caught off guard by seemingly minor details that turn out to be critical? Share your experiences below. Remember, thorough research, understanding your specific needs, and questioning assumptions can save you a lot of trouble—ensuring your medical equipment truly supports your mission for quality care.
Invest in Reliable Calibration and Maintenance Tools to Ensure Longevity
Maintaining precision in medical devices over time demands the right tools. I personally rely on calibrated electronic testers for diagnostic equipment and ultrasonic cleaners for delicate instruments. For example, regularly using a digital thermometer calibration device ensures temperature-dependent measurements stay accurate, which is vital in neonatal care. These tools help catch drift and keep devices within working specifications, saving money and preventing errors.
Strategies for Scaling and Long-Term Results
Automating routine maintenance checks with software like Asset Management System solutions is transforming how clinics oversee device lifecycle. I’ve integrated such systems that send alerts for calibration deadlines or parts replacement, reducing manual oversight. This proactive approach ensures critical devices—like digital blood pressure monitors—remain reliable, thus supporting consistent patient monitoring.
How do I keep medical tools working smoothly over the years?
Focus on routine cleaning, timely calibration, and proper storage. For example, dedicated sterilization stations prevent cross-contamination and prolong device life. I recommend investing in high-grade storage cabinets with anti-static and humidity control features. Regularly reviewing equipment maintenance logs—preferably through integrated management software—can catch issues before they escalate, ensuring compliance and efficiency.
Embrace Technological Advances for Better Results
The future points toward more intelligent maintenance—think IoT-enabled sensors embedded directly into devices, monitoring their status in real-time. According to industry experts like Medical Device Institute, embracing these innovations will significantly reduce downtime and extend equipment lifespan. I encourage you to start experimenting with sensor-based diagnostics on essential devices in your practice to optimize performance and reduce unexpected failures.
Make Your Equipment Last with Regular Upkeep
Implementing scheduled calibration, investing in quality maintenance tools, and leveraging smart management systems are keys to long-lasting, dependable medical equipment. Try setting up a maintenance calendar today using digital tools—your future self will thank you for the seamless operation and improved patient outcomes.

Lessons from the Trenches That Changed My Approach
- I once believed that a quick rinse was enough—until I realized residual contaminants skewed my results, highlighting the importance of thorough cleaning with the right tools.
- Choosing a lab test tube brush with nylon bristles transformed my workflow, proving that quality tools prevent costly mistakes and protect fragile glassware.
- Measuring test tube dimensions precisely before purchasing brushes saved me from scratches and ineffective cleaning—small details matter immensely.
- Understanding the chemistry and material compatibility of cleaning solutions prevented damage and ensured sample integrity, which is vital for accurate diagnostics.
- Adopting a routine of inspecting each test tube visually after cleaning became a game-changer, catching residues early and saving time.
My Secret Weapon Toolkit for Laboratory Precision
- The comprehensive guide 6 Digital Blood Pressure Monitors for 2026 clinics helps me stay updated with reliable, user-friendly devices that stand the test of time.
- Books like “Lab Techniques and Equipment Maintenance” by Dr. Emily Turner have deepened my understanding and improved my practical skills.
- Investing in a quality lab equipment management system, such as Asset Management System, ensures I keep calibration and maintenance on track effortlessly.
- Top-tier cleaning solutions recommended by industry specialists, like the mild detergents from reliable suppliers, provide peace of mind and superior cleanliness.
Harnessing Passion to Drive Laboratory Excellence
Taking your lab practices seriously isn’t just about equipment; it’s a mindset. By focusing on meticulous cleaning routines and continuous learning, you not only ensure data accuracy but also foster a culture of excellence. Remember, your efforts ripple out—affecting research outcomes, patient safety, and professional reputation. So, step forward confidently, knowing that with the right tools and attitude, your lab can achieve new heights of precision and reliability.
What’s the most surprising lesson you’ve learned about maintaining lab equipment? Share your story below and inspire others to refine their cleaning routines!
,